Flat roofs have become increasingly popular in both residential and commercial architecture due to their sleek appearance, space efficiency, and adaptability for modern sustainable systems like solar panels or green roofs. However, achieving a long-lasting and leak-free flat roof requires precision, skill, and the right materials which is why hiring an experienced roofing contractor is crucial. Professional installation follows a structured process that ensures durability, weather resistance, and long-term performance. Below is a detailed step-by-step guide on how professionals install flat roofs properly and efficiently.
-
Initial Roof Assessment and Planning
Every successful roofing project begins with a comprehensive inspection and planning stage. The roofing contractor will assess the existing structure, checking for signs of water damage, rot, or structural weakness. They’ll determine whether the old roof needs to be removed or can be installed over. Next, the contractor chooses the right flat roofing system based on the building’s needs — such as EPDM (rubber roofing), TPO (thermoplastic polyolefin), or modified bitumen.
-
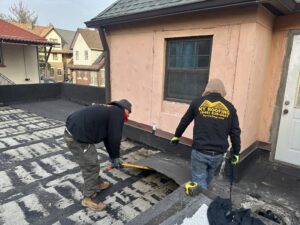
Preparation and Removal of the Old Roof
If a roof replacement is needed, the old materials must be carefully stripped off to expose the deck beneath. This step is critical because any damaged or rotted decking must be repaired or replaced before new materials are applied. A clean, dry, and structurally sound base ensures that the new roofing system adheres properly and performs as expected.
-
Installing the Insulation Layer
Insulation plays a key role in maintaining interior temperature and reducing energy costs. Professional roofers use rigid foam boards or spray-applied insulation, depending on the project type. The insulation is typically laid in multiple layers and secured with mechanical fasteners or adhesives to create a continuous thermal barrier. Proper insulation not only enhances comfort but also extends the lifespan of the roofing system by preventing temperature fluctuations that can cause expansion and contraction.
-
Applying the Roofing Membrane
Once the insulation is secured, the most important layer the roofing membrane is installed. This membrane acts as the waterproof barrier that protects the structure from rain, snow, and UV rays.
-
Flashing and Edge Detailing
Flashing and edge detailing are critical to preventing water infiltration at vulnerable points, such as roof edges, vents, drains, and HVAC penetrations. Roofers use metal flashing, sealants, and specialized membranes to create a watertight finish around these areas.
-
Drainage System Installation
Since flat roofs don’t have a natural slope for water runoff, a reliable drainage system is essential. Contractors typically integrate one or more of the following:
- Internal drains connected to downspouts.
- Scuppers that allow water to flow off the edge.
Conclusion
A well-installed flat roof combines design efficiency, durability, and long-term energy performance. From the initial assessment to the final inspection, every stage of the installation process matters.
Whether you’re building a new structure or replacing an old roof, partnering with a certified roofing contractor at 553 Prospect Avenue Brooklyn NY 11215 (646)-838-0441 https://www.nyroofing.com guarantees a result that’s both watertight and future-proof.
Frequently Asked Questions
What is the first step in flat roof installation?
The first step is a full roof assessment and planning phase, where contractors
inspect the structure, check for damage, and select the most suitable flat
roofing system.
Is the old roof removed before installing a flat roof?
In many cases, yes. Old roofing materials are removed to expose and repair the
roof deck, ensuring a clean and structurally sound base for installation.
Why is insulation important in flat roof installation?
Insulation improves energy efficiency, maintains indoor comfort, and reduces
thermal movement that can shorten the lifespan of the roofing system.
What materials are used for flat roof membranes?
Common flat roof membranes include EPDM rubber, TPO, PVC, and modified bitumen,
all designed to provide waterproof and UV-resistant protection.
Why is flashing important on flat roofs?
Flashing seals vulnerable areas such as edges, drains, vents, and HVAC units,
preventing water intrusion and roof leaks.
How do flat roofs handle water drainage?
Flat roofs use internal drains, scuppers, or gutters to channel water away and
prevent ponding that can damage the roofing membrane.